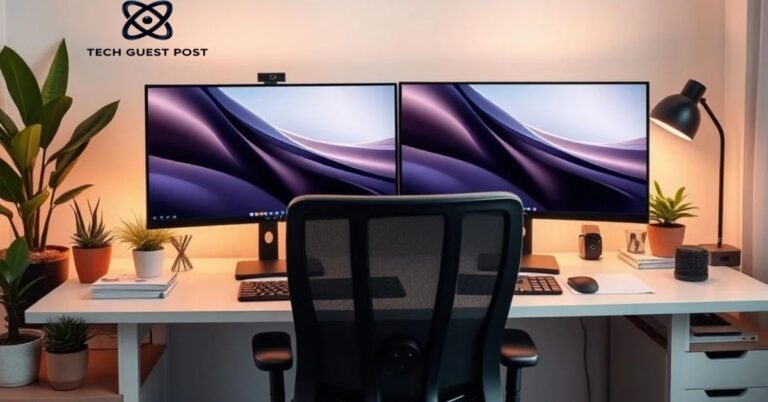
Best Cord Management Ideas to Keep Your Desk Clean and Organized
You sit down to work, and before you even open a single tab, you’re already annoyed. There’s a snake pit of cables running across your desk. Your charger is missing again. Something just knocked your coffee because you yanked the wrong wire. Sound familiar?
A tangled desk isn’t just ugly. It slows you down, kills your focus, and honestly, it’s a little embarrassing when someone sees your “workspace.” The good news is that fixing cord chaos doesn’t require a contractor, a tech degree, or a massive budget. You just need the right cord management ideas and maybe 30 minutes on a Saturday morning.
This guide walks you through every practical solution, from quick DIY fixes to proper cable management setups, so your desk finally looks the way you’ve always wanted it to.
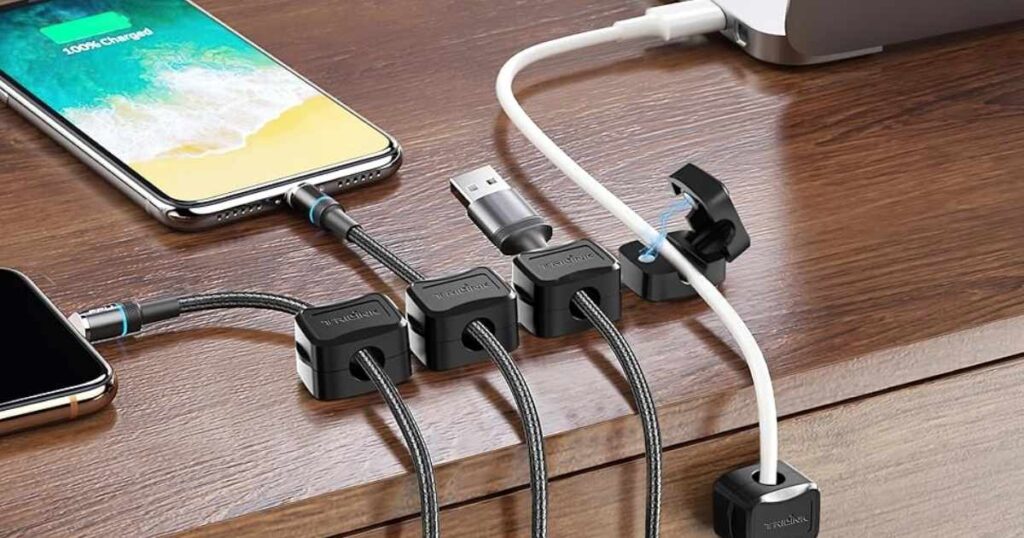
Stick-On Magnetic Cable Clips

Magnetic cable clips might be the simplest upgrade you’ll ever make to your desk. You peel the backing, stick them wherever you want, and let the magnets do the rest. Your cables snap right in and stay put. No more hunting for the wire that slid behind your monitor.
These are ideal for USB cables, charging cords, and headphone wires you reach for constantly. Place a few along the edge of your desk or on the side of your monitor. Every cord has its home. When you unplug your phone, the cable doesn’t vanish. It just hangs there, waiting, like a well-trained pet.
For a home office setup, these little magnetic cable clips work especially well on metal desk legs or frames. They’re removable too, so you won’t damage your furniture.
Read More: Stacked Monitor Setup: Maximize Desk Space, Boost Productivity & Enhance Workflow
Use Rubber Cable Holders for Everyday Cords
Rubber cable holders are underrated. They grip cables firmly without crushing them, and they’re flexible enough to accommodate different cord thicknesses. You’ll find them in multipacks online for next to nothing.
Think about the cords you use daily: your phone charger, your laptop cable, your monitor line. These are the ones that end up on the floor the moment you push your chair back. A rubber cable holder mounted near your power source keeps all of them in reach and off the ground.
They also protect cables from bending at sharp angles, which is actually how most cords die early. So these little holders aren’t just for tidiness. They’re quietly extending the life of your gear too.
Wrap Cables with Reusable Velcro Straps
Velcro cable straps are one of those things you buy once and use forever. Unlike zip ties, you can undo them and redo them as many times as you need. That matters more than you’d think, because cable setups change. You get a new monitor. You rearrange your desk. You decide your laptop should live somewhere else now.
Wrap a velcro strap around a bundle of cables and you’ve instantly turned chaos into a clean, manageable group. These straps come in various widths and lengths. Use the shorter ones for individual cords and the longer ones for thick bundles running down the back of your desk.
They’re also great for travel. Wrap your charger neatly before packing and you’ll never pull a tangled mess out of your bag again.
Bundle Multiple Cables with Zip Ties
Sometimes you just need something that holds firm. That’s where zip ties for cables come in. They’re incredibly secure, inexpensive, and widely available. If you have a PC setup with multiple cables running in the same direction, bundling them with zip ties creates a clean, intentional look that actually feels satisfying to achieve.
The trick is not to over-tighten. Cinch them just enough to hold, not so much that you’re compressing the cables. Also, leave a little slack between ties so the bundle can curve naturally rather than pulling straight.
For a permanent setup, zip ties are perfect. For cables you frequently disconnect, you’re better off with velcro. Use both strategically and your desk will look seriously organized.
Organize Wires Using Cable Sleeves
A cable sleeve organizer is the solution that looks the most polished when done right. It’s essentially a flexible tube, usually made of neoprene or braided fabric, that you feed multiple cables through. On the outside, all you see is one clean sleeve instead of five separate wires.
This works beautifully for the cable run behind your monitor or the bundle that drops from your desk to the floor. It doesn’t just hide cables. It groups them into something that actually looks intentional.
Cable sleeves come in different sizes. Measure how many cords you need to contain before you buy. Some sleeves split open along one side, which makes inserting cables easier without having to thread everything from one end.
Install Cord Covers for Floor Cables
Floor cables are a hazard. People trip over them. Pets chew on them. Vacuum cleaners eat them. Cord covers for floors solve all of that in one go.
These flat plastic or rubber channels sit directly on the floor and protect cables running along baseboards or across the room. They’re low-profile enough that nobody really notices them, but they make a dramatic difference in how clean and safe a room feels.
They’re especially useful in home offices where you need to run a cable from a wall outlet to a desk some distance away. You can even paint over some cord covers to match your wall or floor color, making them nearly invisible.
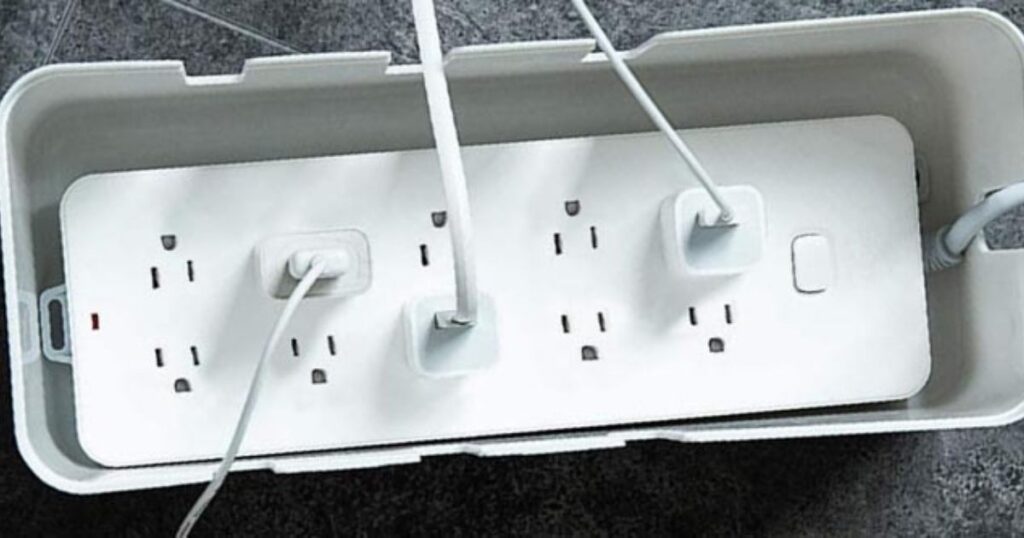
Hide Power Strips Inside Cable Boxes
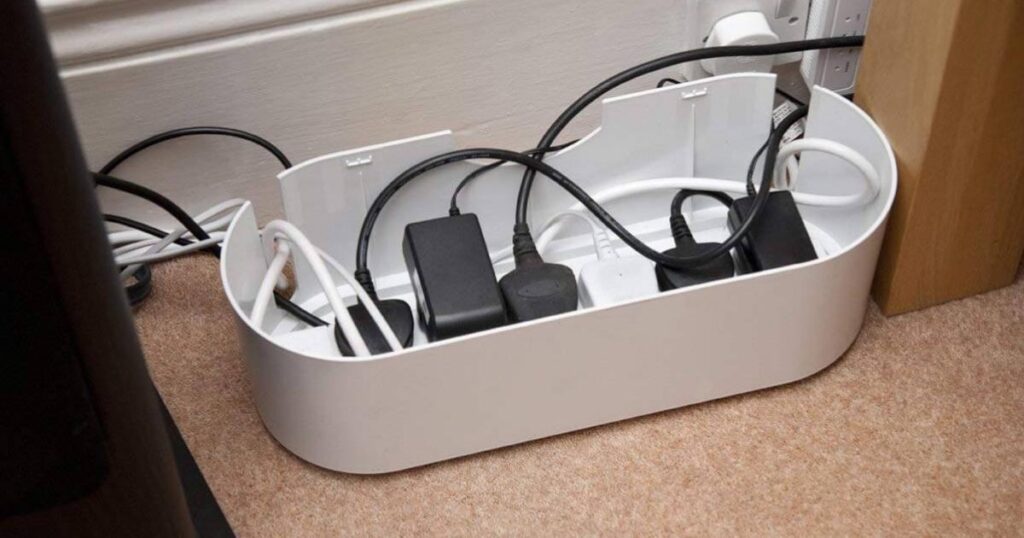
A power strip box is one of the most underrated purchases for cable management for home office setups. Essentially, it’s a decorative box designed to house your power strip completely. Your cables go in through cutouts on the sides, and the whole messy situation disappears behind a clean exterior.
You get all the outlets you need, but none of the visual clutter. From the outside it just looks like a little box sitting on or under your desk. Nobody knows there’s a tangle inside. That’s the beauty of it.
These boxes come in wood finishes, matte black, white, and more. You can pick one that blends with your desk or acts as a subtle design element. Either way, your power strip goes from being the ugliest part of your setup to completely invisible.
Label Every Cord for Easy Identification
Here’s a small habit that pays off enormously. Label your cables. Every single one.
When something stops working, you won’t spend ten minutes tracing wires trying to figure out which one powers what. When you need to unplug your monitor, you’ll know immediately which cable to grab. Labeled charging cords save time and prevent accidents.
Cable labeling tags are purpose-built for this. They wrap around the cable near the plug end and have a writable surface. You can also use adhesive labels or even a permanent marker on a piece of tape. The method matters less than the habit.
If you share a workspace with others, labeling becomes even more critical. Nobody is accidentally unplugging your setup because they couldn’t tell your cables from theirs.
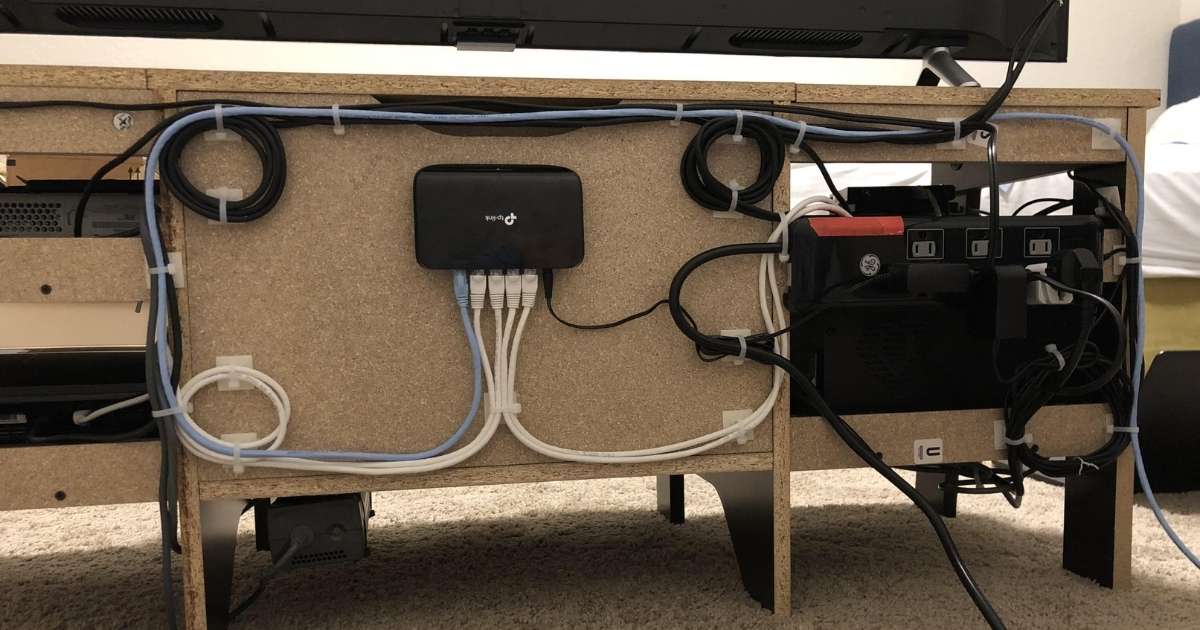
Add an Under-Desk Cable Management Tray
An under desk cable tray might be the single biggest upgrade you can make to your workspace. It mounts underneath the desk surface and holds your power strip, cables, and even adapters completely out of sight. From the front, your desk looks immaculate. Underneath, everything is organized in a proper home.
Most trays attach with screws or adhesive strips. They come in metal mesh or solid designs. Metal mesh trays are popular because they allow heat to dissipate and you can see what’s inside without removing anything.
This is one of the first things serious home office builders install, and once you have it, you’ll wonder how you ever worked without it.
Tuck Cords Behind Furniture to Hide Them
Before spending money on anything, look at what you already have. Furniture can do a lot of heavy lifting when it comes to hiding cables. Run cords along the back of your desk, behind your bookshelf, or down the inside of a cabinet panel.
A little bit of routing can make a massive difference. Use small adhesive clips to hold wires flush against surfaces, and they’ll essentially disappear from view. This works especially well for monitor cables and power cords that just need to go from point A to point B.
The goal is to keep cables vertical and flat against surfaces rather than draped loosely across open space. Gravity and attention tend to work in your favor once the path is planned.
Mount Your Power Strip Under the Desk
Taking your power strip off the floor is a game changer. When it’s on the floor, it’s a dust magnet, a trip hazard, and an eyesore. When it’s mounted under your desk, it becomes a utility tool you never have to look at.
You can use a velcro strip, an adhesive mount, or a dedicated power strip mounting bracket to get it up there. Route all your cables up to meet it and suddenly your floor area is completely clear. No more kicking the power strip when you move your chair. No more dust bunnies nestled around the outlets.
This pairs perfectly with an under-desk cable tray, which can hold both the strip and any excess cable slack in one hidden location.
Bundle Monitor Cables for a Cleaner Setup

Your monitor probably has at least three cables attached to it: power, display, and maybe a USB hub connection. Left alone, those cables fan out like a waterfall behind your screen. That’s not a great look.
Bundle them together using a velcro strap or a small cable sleeve and route them as a single unit down the back of your monitor stand. Suddenly the area behind your display looks intentional and clean rather than accidental and chaotic.
If your monitor stand has a built-in cable pass-through or slot, use it. Those features exist specifically for this. Take five minutes to thread your cables through properly and you won’t believe the difference.
Switch to Wireless Devices to Reduce Cords
Sometimes the best cord management is no cord at all. A wireless keyboard and mouse eliminate two of the most common desktop cables immediately. Wireless headphones remove another. A wireless charger on your desk means your phone cable doesn’t need to live there permanently either.
This isn’t about going fully wireless, which may not even be practical for your setup. It’s about identifying which cables annoy you most and asking whether a wireless alternative exists. Often, it does.
Fewer cables means fewer problems to manage. It also means fewer failure points, less visual noise, and a genuinely cleaner desk with minimal effort.
Use Desk Grommets for Cable Routing
A desk cable grommet is a small circular fitting installed in a hole cut through your desk surface. Cables feed through it cleanly, disappearing from the top of the desk and reappearing below, where they connect to power strips or cable management systems hidden underneath.
If your desk already has a grommet hole, fantastic. Feed your cables through and enjoy. If it doesn’t, you can buy grommet kits that include a drill guide, or choose a desk that comes with them built in.
Grommets give your setup a finished, professional look. Instead of cables draping over the edge of your desk, they just vanish through a clean circle. It’s a small detail that makes a big visual impact.
Install Vertical Cable Channels on Your Desk
A vertical cable channel is a narrow plastic or aluminum track that attaches to a wall or the leg of your desk. Cables run inside it from top to bottom, completely concealed. From the side, all you see is a clean channel. No wires visible at all.
These are especially useful when you have cables traveling from your desk surface down to the floor or up to a wall-mounted monitor. Without a channel, those cables just hang. With one, they look like part of the furniture.
Most channels come with adhesive backing or screw-mounting options. Pick whichever suits your setup. They snap open for easy cable insertion and click shut when you’re done.
Choose Monitor Stands with Built-In Cable Slots

If you’re in the market for a new monitor stand or arm, look for one with cable management built in. Many modern stands include channels, clips, or hollow arms specifically designed to route your monitor’s cables internally.
The result is a monitor that appears to float cleanly above your desk with no visible wiring at all. It looks expensive and intentional, even if the stand itself wasn’t particularly pricey.
This is the kind of upgrade that makes people ask what changed about your setup. You didn’t get a new monitor. You just made the cables disappear.
Use Binder Clips as DIY Cord Holders
Here’s a cord management idea that costs almost nothing. Clip a large binder clip onto the edge of your desk and thread your cable through the metal handle. The clip grips the desk. The cable stays put. Done.
Binder clips for cable management became popular on the internet years ago and for good reason. They work. A few of them along your desk edge keep your most-used cables right where you need them without investing in any specialized products.
Use black binder clips on a dark desk and they practically disappear. Use them near your charging area so your phone cable is always within reach, even when your phone isn’t plugged in.
Wrap Cables with Fabric or Shoelaces
This one sounds unusual, but it’s genuinely effective and it adds a custom look to your setup. Wrapping cables with fabric cord covers or even spare shoelaces gives them texture and personality while also bundling them together.
Braided fabric sleeves are sold specifically for cables and create a premium, woven look. But if you want something truly DIY, a thin shoelace wrapped in a spiral around a cable bundle looks surprisingly sharp, especially in a setup with a lot of visible cabling.
It’s also practical. Fabric wrapping protects cables from friction wear, which is a real issue for cables that rub against desk edges or each other constantly.
Organize Wires with Command Hooks
Command hooks are one of the most versatile tools in any home organizer’s toolkit. For cable management, they’re surprisingly effective. Stick a small hook on the underside of your desk, the back of your monitor, or along the wall, and use it to guide a cable along a specific path.
The adhesive backing means no drilling, no damage, and easy repositioning if your setup changes. Use them to create a cable “highway” running behind your monitor, down the desk leg, and toward the power source. Each hook is a waypoint that keeps everything aligned.
They come off cleanly if you ever want to rearrange, which makes them ideal for renters or anyone who likes to experiment with their setup.
Create a DIY Charging Station at Home
A DIY charging station solves one of the most common desk complaints: multiple devices competing for the same outlets with cables going everywhere. The concept is simple. You dedicate a small spot on or near your desk specifically for charging, with every cable routed neatly into that zone.
You can build one using a small wooden box, a decorative basket, or even a repurposed drawer organizer. Put a small power strip inside, drill or cut holes for the cables, and route each charger through its own hole. The result is a single, contained charging zone where everything lives.
Phones, tablets, wireless earbuds, smartwatches: they all have a home. Nothing is scrambling for an outlet. Nothing is draped across your keyboard. It’s a simple idea that genuinely transforms how a desk functions day to day.
Use Twist Ties to Bundle Small Cables
Twist ties are the forgotten heroes of cable tidiness. You probably have a drawer full of them from bread bags and produce. They’re short, flexible, and perfect for bundling thin cables like USB cords, earphone wires, and small charger leads.
Use one to coil a cable neatly before storing it, or use a few to group cables running along the same path. They’re not as clean as velcro or zip ties for permanent setups, but for a quick fix or for organizing cables in a drawer, they’re hard to beat.
The biggest advantage is that they cost nothing. If cable management has felt overwhelming or expensive, start here. A few twist ties can bring immediate order to at least some of the chaos.
Clip Clothespins to Your Desk for Cord Control
Wooden clothespins have a surprising second career as cable holders. Clamp one onto your desk edge and the spring tension holds a cable neatly in place. They work similarly to binder clips but with a slightly more rustic, casual aesthetic.
You can paint or stain them to match your desk, making them look intentional rather than improvised. They’re also gentle on cables since the wood doesn’t scratch or cut into the insulation.
This is a great option for people who want a cozy, creative workspace rather than a corporate, all-black setup. Pair with a wooden desk and natural finishes and the clothespins look right at home.
Label Cables with Washi Tape or Masking Tape
If you don’t have cable labeling tags on hand, washi tape is a brilliant substitute. Fold a small piece around the cable near the plug, then write on it with a fine-tip pen. It’s colorful, removable, and surprisingly durable.
Using different colors of washi tape for different cable types is even smarter. Blue for monitor cables. Green for USB. Orange for power. At a glance, you know exactly what’s what without reading anything at all.
Masking tape works the same way if you prefer a neutral look. The key is writing clearly and placing the label near the plug end where you’ll actually see it when you’re reaching behind your desk.
Reuse Bread Tags to Label Chargers
This is the kind of tip that feels almost too simple, but it works perfectly. Those little plastic bread bag clips? Write on them with a marker, clip them around your cables, and you’ve got instant labels for practically nothing.
They’re especially good for chargers that look identical. Most phone chargers are indistinguishable from each other, but a bread tag labeled with a name or a symbol changes that instantly.
It’s also a satisfying bit of upcycling. You’re giving something destined for the bin a second life as functional organization. That feels good on a couple of levels.
Install Adhesive Cable Raceways on Walls
A cable raceway is a flat plastic channel that sticks to the wall and hides cables running along its surface. Unlike cord covers for floors, raceways are designed for vertical and horizontal runs along walls, baseboards, or even the backs of furniture.
They’re particularly useful when you need to route a cable from a wall outlet to your desk without it dangling in mid-air. Paint-over options exist for virtually seamless blending with your wall. Some raceways even accept multiple cables in separate compartments, keeping everything organized within the channel itself.
Installation is straightforward: peel, stick, press, and route. Most peel-and-stick versions hold firmly and can be repositioned if needed. For a clean, finished look without drilling, raceways are one of the best tools available.
Use a Cable Management Box for Power Strips
A cable management box is essentially a decorative container sized to hold a power strip and conceal all the cables connected to it. Cords enter through openings on the sides and the lid closes over the whole situation, leaving a clean, box-shaped object on or beneath your desk.
This is one of the most immediate visual transformations you can make. That cluster of outlets and cords behind your monitor disappears completely. The box itself can be stylish too. Many are made from bamboo, wood-grain finishes, or matte materials that look genuinely nice on a desk.
It also acts as a mild safety measure. A covered power strip is less likely to collect dust in the outlets and less likely to get bumped or splashed.
Install a Cable Management Spine for Standing Desks
Standing desks have a unique cable challenge. When you raise or lower the desk, any cables not properly managed will snag, stretch, or pull. That’s where a cable management spine comes in.
A spine is a flexible conduit that attaches to the back leg or frame of a standing desk. As the desk moves, the spine flexes with it, keeping all your cables gathered and protected throughout the full range of motion. It’s purpose-built for desks that adjust height, and it makes a noticeable difference in both aesthetics and cable longevity.
Without one, you’re constantly re-routing cables or dealing with one that got pinched in the mechanism. With one, you forget cables are even involved. It’s the kind of product that disappears into your workflow in the best possible way.
FAQ’s
What is the easiest cord management idea for beginners?
Start with binder clips or velcro straps. Both are inexpensive, require no tools, and deliver immediate results without any commitment.
How do I hide cables on my desk without drilling holes?
Use adhesive cable clips, command hooks, or a cable management box. All of these attach without drilling and can be removed cleanly if needed.
Are cable sleeves safe to use with all types of cables?
Yes, cable sleeves are safe for most standard cables including USB, HDMI, and power cords. Just avoid over-stuffing the sleeve, as that can trap heat.
How many cables can an under-desk cable tray hold?
Most under-desk trays comfortably hold a power strip plus four to eight cables depending on the tray size and cable thickness.
Can I use cord management ideas for a PC gaming setup?
Absolutely. Cable management for PC setups often includes cable sleeves, under-desk trays, zip ties, and grommets. A cleaner setup also improves airflow around your equipment.

Evan Cole is a tech enthusiast and digital strategist with years of experience in content marketing and SaaS trends. He explores emerging technologies, AI innovations, and SEO-driven growth strategies. Evan’s insights help readers understand complex tech topics through practical examples and real-world applications that inspire smarter digital solutions.